Need accuracy? You might need scanning.
One of the main reasons you may choose to use tactile scanning technology is the improved accuracy that scanning affords. For example, in some cases, the choice of a scanning alone will improve the accuracy of the system nearly 30% with the remaining variables being equal.
Additionally, by increasing the number of points you take on your considered features, you improve the accuracy and confidence in the data captured. One of the caveats of scanning is that it is more expensive, but in the case of the SP25M it is not necessarily true. Lets find out more about the SP25M.

One way to maximize your scanning technology is to have a good platform that you are putting the scanning on. If you think about how a CMM acquires discrete points, the scanning system is much more dynamic. The CMM can move in up to 3 axis while scanning versus moving in one axis for taking a single point.
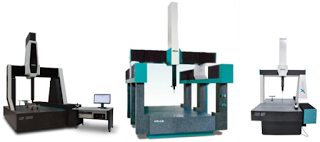
You need an inherently rigid platform, that resists deformation, and minimizes the impact of these dynamic forces. In our opinion, Wenzel America CMM’s provide a variety of platforms great for the purpose of scanning.
How it works
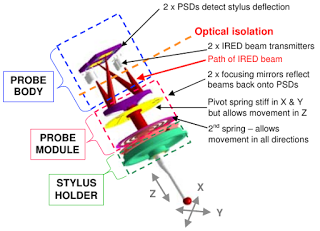
“The probe body houses the probe electronics and two of the three components which comprise the ‘isolated optical metrology’ transducer system, these being a pair of infrared beam sources (IREDs) and a pair of light sensitive position sensing devices (PSDs).
The scanning module houses the remaining components of the isolated optical metrology system which are a patented pivot spring motion system with an integral pair of reflective concave mirrors.

The pivoting motion system comprises two diaphragm springs and a ferrofluid damping system. One spring allows movement in all directions whilst the other (pivot) spring is stiff in (probe) X & Y but allows movement in Z.
The reflective mirrors are integrally mounted to the motion system and therefore move directly with stylus deflection.
In operation, the IRED beams, originated in the probe body, are directed onto the mirrors inside the scanning module. These beams are then focussed and reflected back onto the PSDs in the probe body and can then be translated into spatial measurement coordinates.”
What this means for you?
There is some forethought that needs to go into the selection of which module you will use most. After that, however it is a simple matter of picking up the module, qualifying your stylus and start measuring.

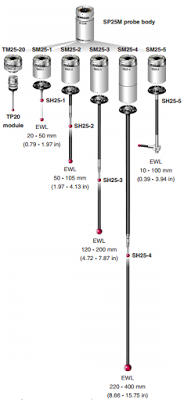
The sensor physics dictate how much the maximum deflection can be. For any scanning systems based on these principles (Zeiss XXT, Hexagon LSP-X1, Renishaw SP25), some consideration has to be given to what expected working length (EWL) you need for your application.
If you are reaching into a deep bore, for example, you may choose something like the SM25-4 which gives you an EWL between 220-400mm.
Even if you are moving up from a TP20 situation, you can get the TM25-20, which allows you to use your existing stock of TP20 modules for your existing applications that you are not going to use scanning.
This is the beauty of the SP25 system. You can add it to your existing PH10 system relatively painlessly. You do not have to lose your library of existing TP20 programs and accessories. For your existing applications, just carrying on as usual. For new programs and programs that you want to re-write you can take advantage of your new SP25 scanning system.
Is the SP25 scanning solution for you?
The following check list will help you.
- Do you have a PH10 probehead? If so, jumping into SP25 scanning could be as easy as buying the scanning module, you may have to add scanning capabilities to your controller.
- Do you have a need for increased accuracy over your current probing system? In most cases, there is an immediate increase in accuracy by the use of a SP25.
- Do you need a way to increase throughput and data confidence? Many applications will improve the throughput and confidence by scanning. How? Reducing machine positioning moves when the CMM hunts and pecks with a touch trigger probe. While scanning, the stylus stays in contact with the part as it is simultaneously collecting hundreds, if not thousands of points. This provides the dimensional data for the feature as well as giving you an idea of the form.
If you need even greater throughput check out our other posts this month on the:
