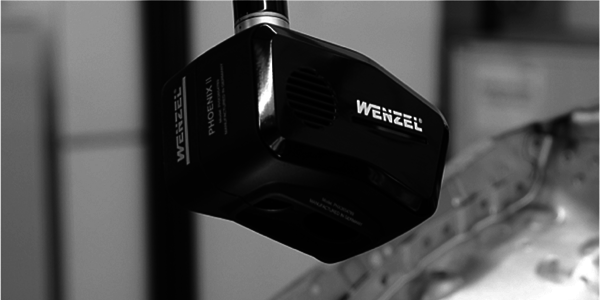
At a Glance: PHOENIX Measuring Process
- Preparing – The optical cmm sensor does not require any reference marks, time for heating or pre-treatment of the surfaces.
- Calibration – The sensor is calibrated with a reference sphere. Due to the full integration into WENZEL software recalibration is not necessary.
- Measuring – Rapid and non-contact capturing of geometry elements and point clouds. The combination with tactile sensors meets a very wide variety of different measuring requirements in a closed system.
- Evaluate – By short capture and evaluation cycle times, meaningful results are generated directly after the measurement with the standard measuring software Metrosoft CM.
- Export – Easy export of measuring data into modern CAD, CAM or CAQ systems.
Your Benefits at a Glance
- Measure without the need to stick on reference marks and without pretreating the surface that has to be measured
- Saving time by fast measuring
- Collection of features (geometry elements) and point clouds in one system
- Automatic detection of geometric elements
- Tactile measurement comparison (optical and tactile measurements have the same data output)
- Minimal training required (already known and intuitive software system)
- Use of existing systems (upgrade with little effort)
- Color, temperature, material, user and surface insensitive sensor
Universal Use
- Ideal tool for quality assurance, serial monitoring and serial analysis
- Typical application areas of the PHOENIX are the automotive industry, but also plastic and sheet metal processing
- The small and lightweight design allows the sensor to be connected to 3D coordinate measuring machines with standard components and the use in production lines and special measurement units
Accurate Results for Different Materials, Colors and Finishes
- The sensor enables the detection and measurement of mixed materials such as carbon fiber reinforced plastics combined with aluminum and sheet metal.
- The sensor parameters can be adjusted to suit the material.
- The PHOENIX has the ability to recognize different textured surfaces, to diagnose defects such as scratches and even to collect barcodes for process control.
- The sensor is relatively insensitive to ambient lighting and delivers reliable results almost independently of the lighting conditions.
- The PHOENIX can record data on different colors and work pieces with different surface texture
- Multi-colored components and small, rough finish and flexible work pieces can be measured easily quickly.
Multi-Sensor Operation and Automatic Exchange
- In multi-sensor operation, the advantages of the PHOENIX optical sensor can easily be combined with the advantages of tactile measuring systems.
- Both technologies can be used independently or together.
- With Renishaw ACR1, ACR2 and ACR3 probe changers the sensors can automatically be changed.
- A retrofit of existing systems can be easily implemented.
High Measuring Productivity
- Information from gray scale images and 3D points are determined, saved and analyzed in one common coordinate system at high resolution.
- Within a very short time all the necessary data for the measurement object can be recorded.
- The new PHOENIX is fully integrated into WENZEL software packages. Due to its light weight it can be mounted on the PH10 motorized indexing head and the PHS servo positioning head from Renishaw.
- All system components match perfectly because measuring machine, sensor and software are developed and maintained by WENZEL.
Unique Functionality – The Combined Solution
Technical Data
| Weight [g] | 315 |
| Dimensions (L x B x H) [mm] | 120 x 78 x 74 |
| Working Distance [mm] | ~ 70 (+/- 15) |
| Measuring Field [mm] | ~ 40 x 30 x 30 |
| Resolution [Pixel] | 754 x 480 (~ 0,05 mm) |
| Accuracy [µm] | +/- 8 Probing Error according DIN ISO 10360-2 (MPE-P) |
| Live-Images per second | Max. 30 |
| Measuring Time (Circle) | ca. 2,0 sec |
Fast
- No need for preparation time – No markers bonding – No calibration of markers
- Shortest calibration time
- Quick recording
- Direct evaluation: Measurement results are obtained immediately after the measurement
Flexible
- Evaluation of mixed materials possible (i. e. CFK combined with Aluminum)
- Texture identification (i. e. barcodes, defects such as scratches)
- Color detection ⇨ higher degree of automation and accuracy
- Measurement of multicolor components and small, rough and soft workpieces
Compatible
- One sensor for measuring geometry elements and planar point clouds
- Adaptable (Autojoint) at Renishaw probe heads PH10 and PHS
- Automatically exchangeable via Renishaw ACR1, ACR2 und ACR3 autochange rack
- Upgrading and retrofitting of existing systems and processes
- Complete solution from one supplier of measuring machine, controller, sensor and software
